There’s always something exciting happening here at Changelly, and today, we’re thrilled to introduce you to our newly launched feature — Direct Buy — designed to provide a seamless and straightforward way for you to acquire cryptocurrencies. Whether you’re a seasoned trader or a newcomer just starting your crypto journey, this step-by-step guide will help you navigate and make the most out of Changelly’s Direct Buy feature. So, buckle up and get ready to discover how you can maximize the process of buying crypto with this innovative addition to our platform. Let’s dive in!
Table of Contents
Step 1. Go to changelly.com/buy-crypto
To start, click the Buy button on the left side of our main page or navigate to changelly.com/buy-crypto and log into your account. Remember, our Direct Buy feature is exclusively available to our logged-in European customers only, ensuring a secure and personalized experience.

Step 2. Set up your order
Next, it’s time to set up your order. You’ll need to select the cryptocurrency you wish to purchase and the fiat currency you plan to use for payment.
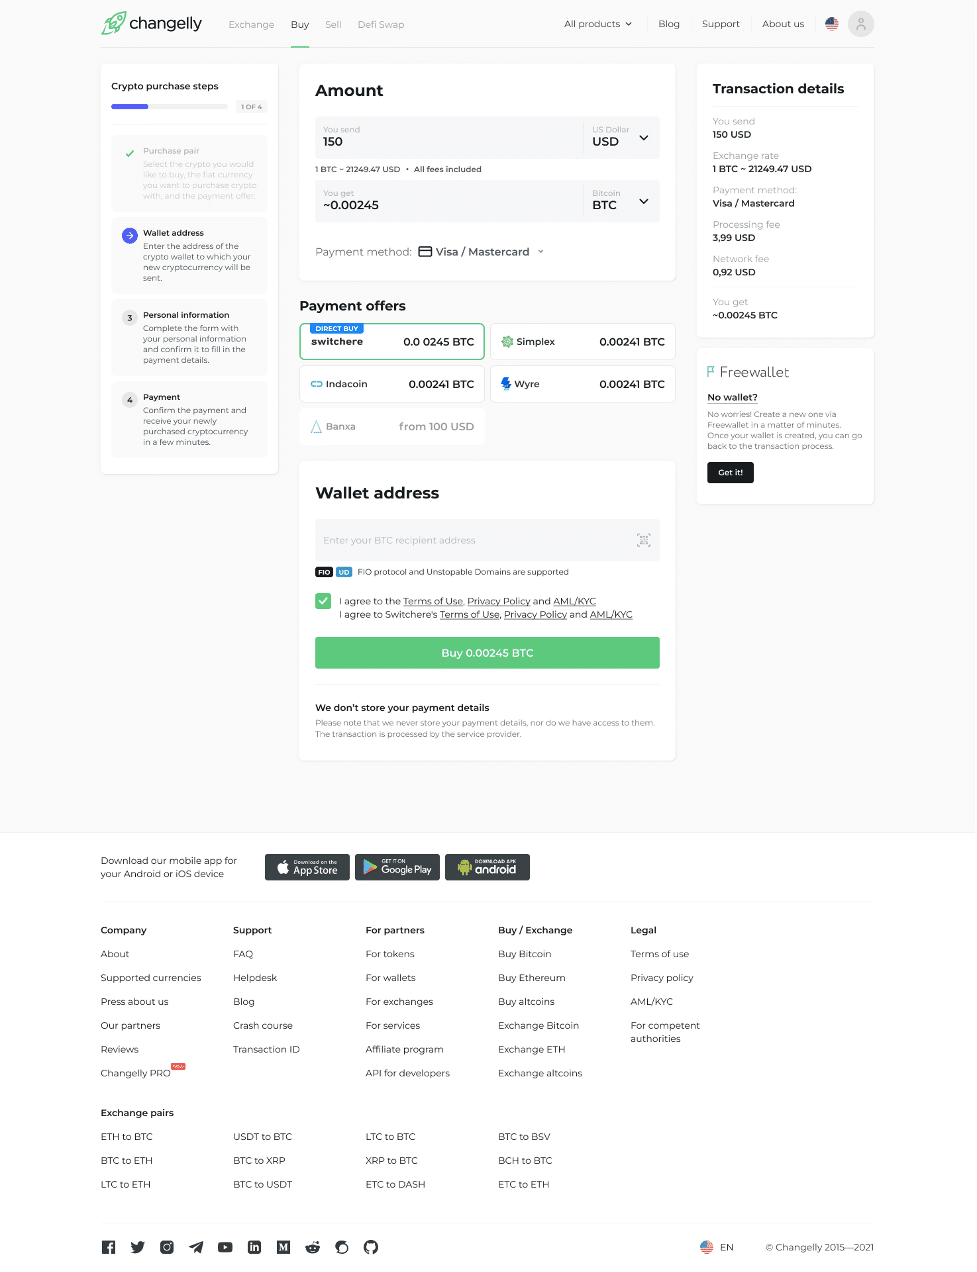
At present, the only payment method supported by our Direct Buy feature is a bank card.
Step 3. Click on Switchere’s offer
Now, you’re ready to select the Switchere payment offer. Please note that as of the present moment, our Direct Buy feature is fully integrated only with Switchere. Don’t worry if you’re not familiar with this payment option yet; we’re here to guide you every step of the way.
Important: This guide focuses on purchasing cryptocurrency using the Direct Buy feature, made possible through our collaboration with Switchere. Look for the distinctive blue Direct Buy label next to Switchere’s option. If it’s not there, this indicates that the feature is temporarily out of service or unavailable in your country. If you’re considering buying crypto through Switchere without utilizing the Direct Buy feature, you can check out this comprehensive guide.
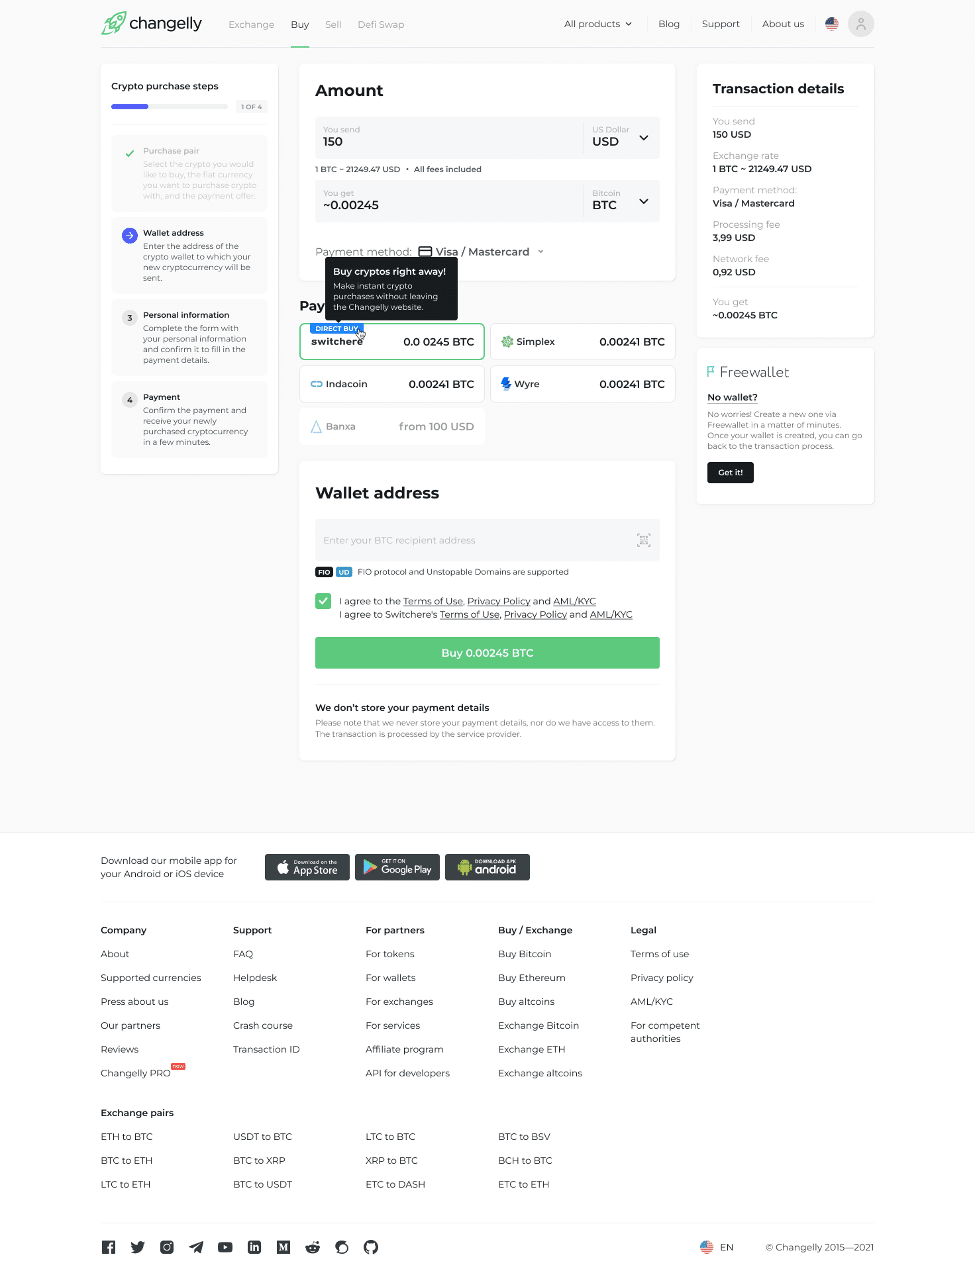
Step 4. Enter your crypto wallet address
Moving forward, you’ll need to enter the wallet address where your newly purchased crypto will be sent. The address you input must match the specific cryptocurrency you intend to purchase; additionally, the network you opt for must align with the network associated with your address.
Make sure you’ve read and agreed to our and Switchere’s terms of use, as well as our AML/KYC policies, by checking the box at the bottom of the page. Once you’ve done this, all that’s left is to click the Buy button.

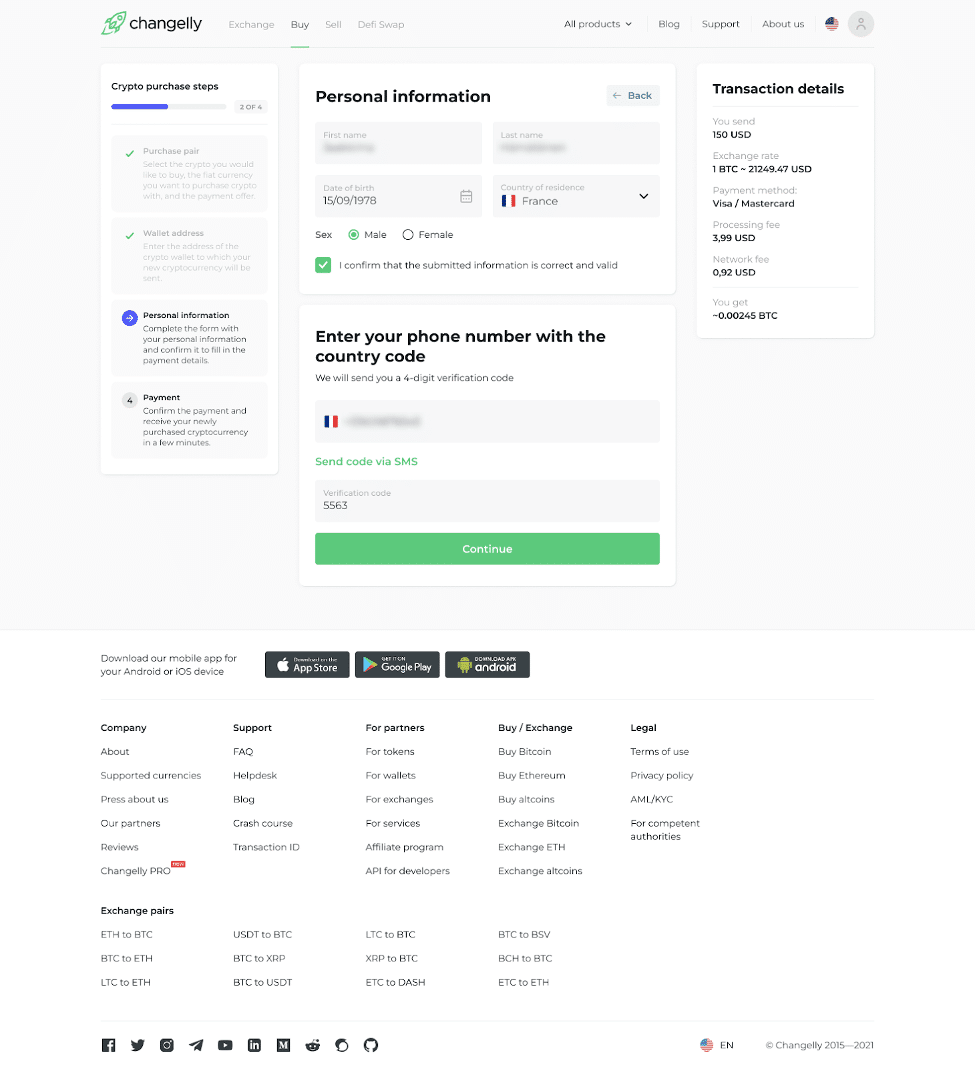
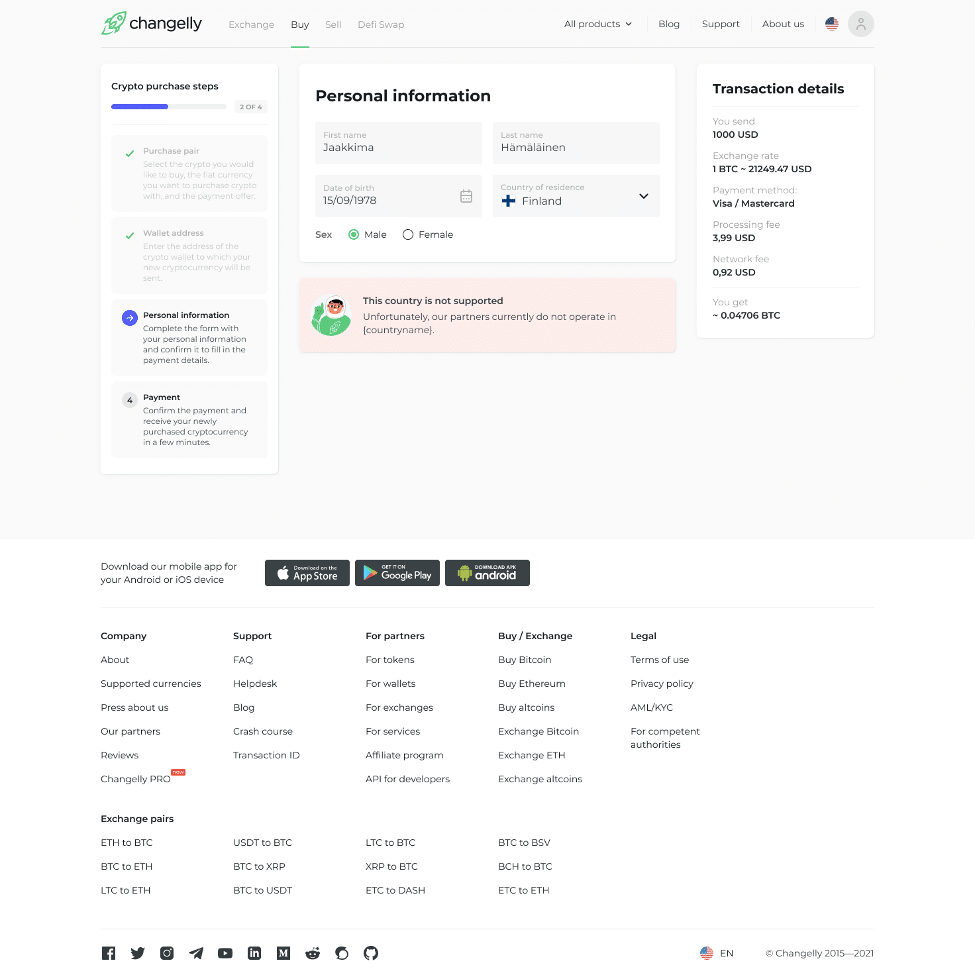
Step 5. Verify your identity / KYC
We prioritize security and transparency. Hence, we’ll require some personal information. Based on your purchase amount, the required data may vary.
Buy crypto without KYC – up to 150 USD/EUR
If your purchases this month have not exceeded the 150 USD/EUR limit, this is your section. No need to go through the full KYC/AML procedure. Instead, we’ll ask you to provide some basic personal info: your first and last name, date of birth, gender, and country of residence. Input the required information in the corresponding fields.
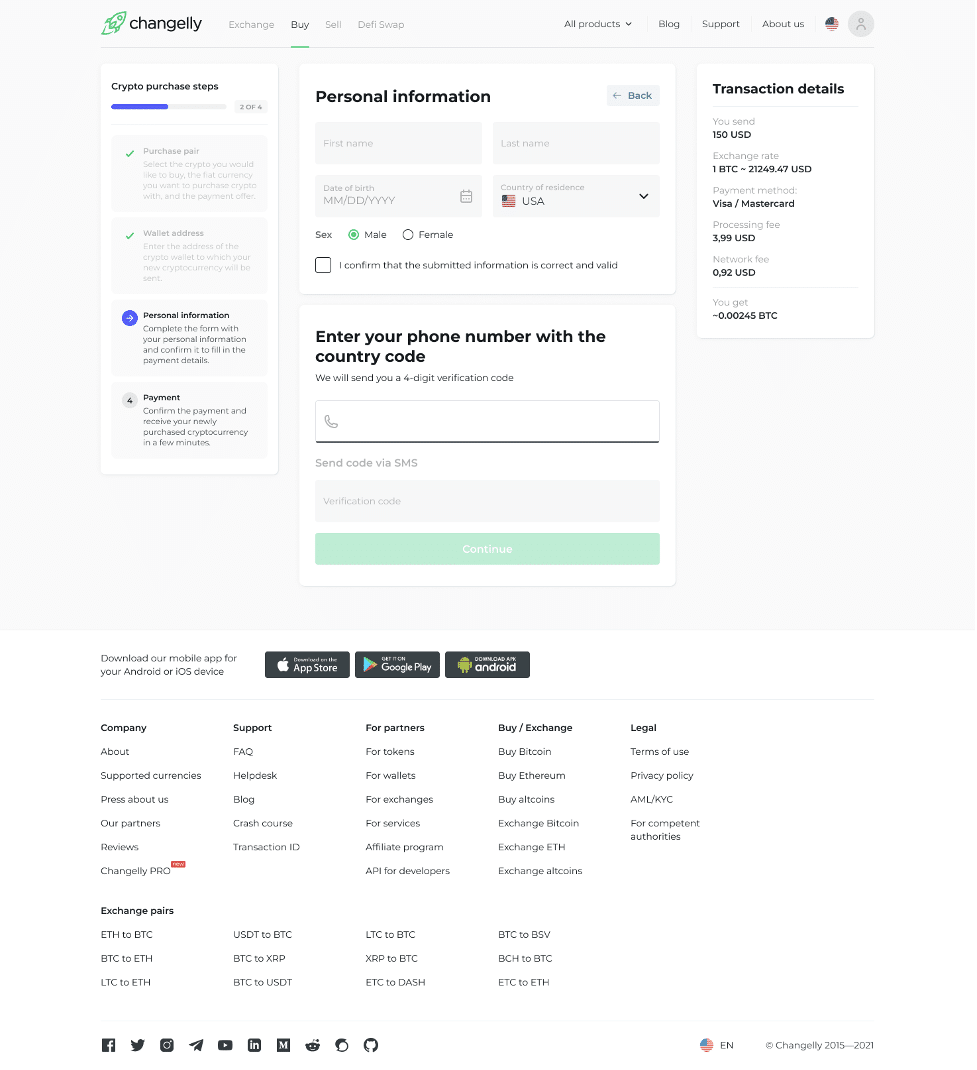
Next, enter your phone number with the country code, receive a verification code, and type it in the designated field. Once done, click the green Continue button and prepare to sail through to Step 6 of our guide.
From 150 USD/EUR and more
For our valuable customers intending to purchase over 150 USD/EUR per month, we’ve implemented a KYC procedure. Please have your identity document ready to ensure a smooth process. After you’ve done that, tick the box to agree to our Personal Data Processing terms and then click the Next button. Rest assured, we treat all your data with the utmost care, and it’s only used to maintain the highest standards of security and compliance.
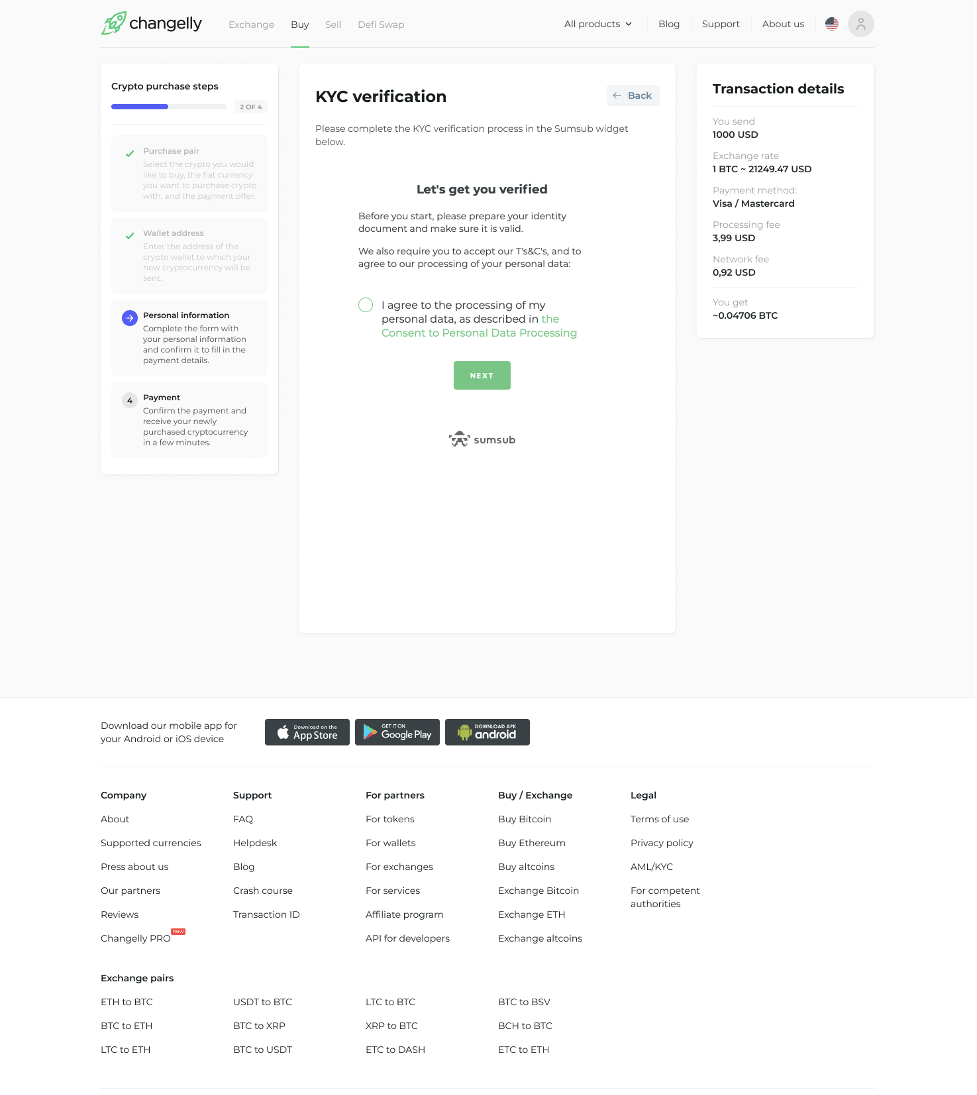
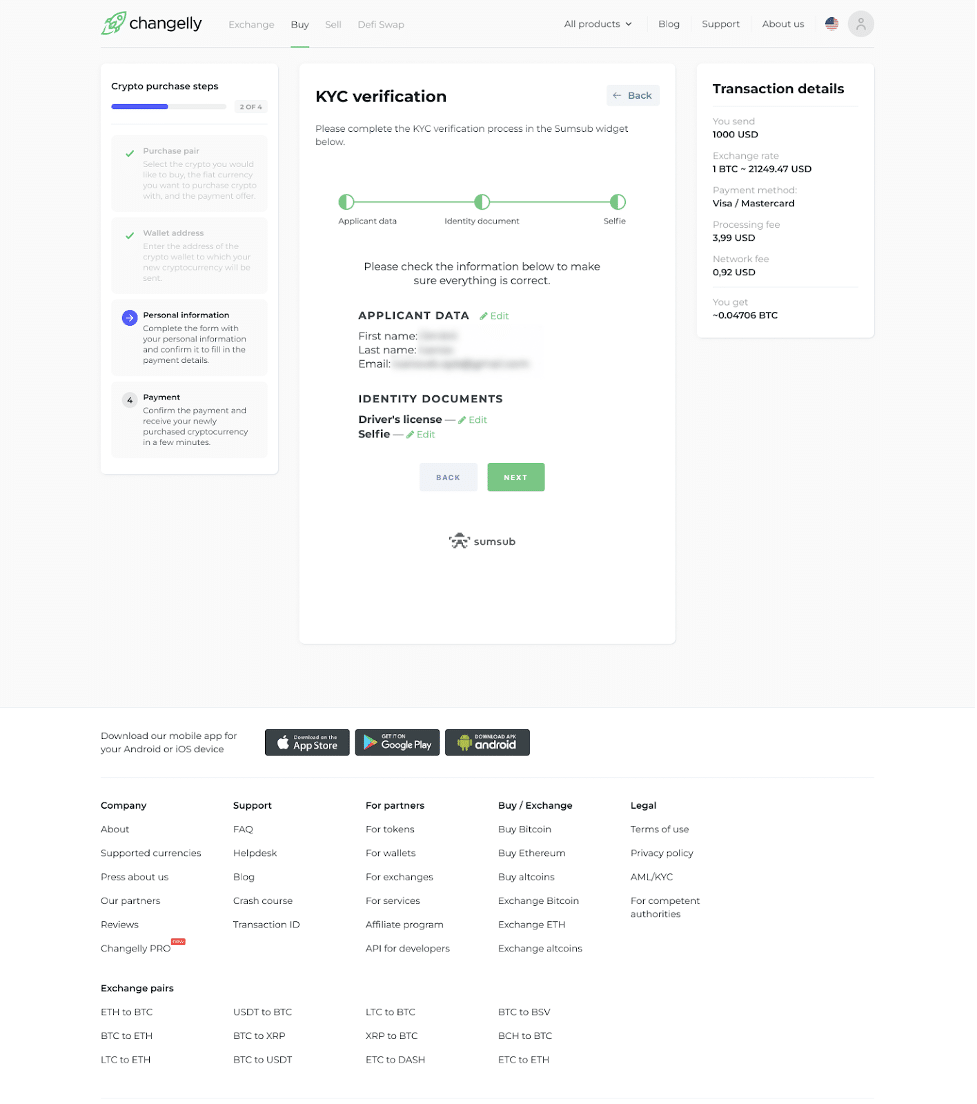
Firstly, a window will open where you’ll be prompted to enter your first name, last name, and email address into the designated fields. Make sure to review the details for accuracy before clicking Next.
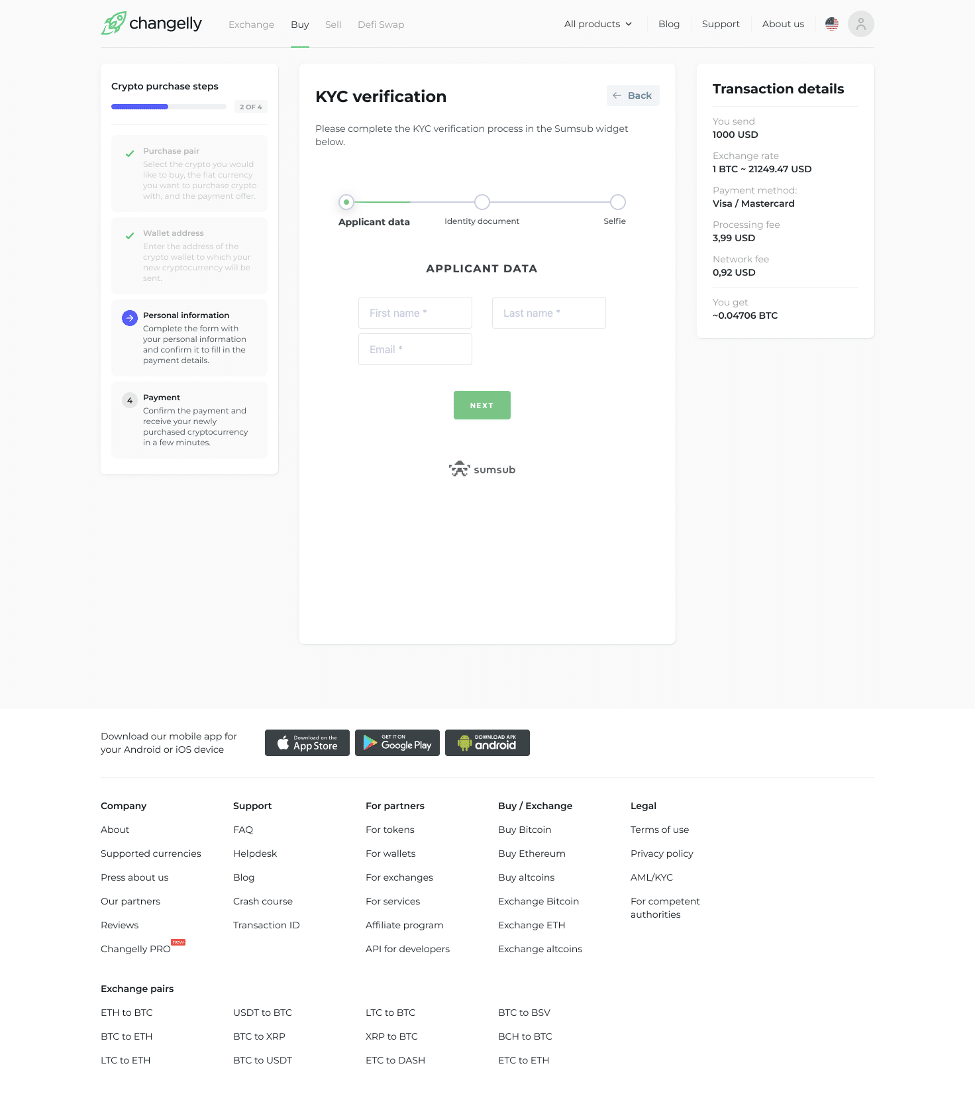
You will then be required to input data from your identification document. You can use any of these: ID, passport, driver’s license, or residence permit. Remember, the document must be currently valid. Choose the type of document you’ll be using by ticking the relevant box.

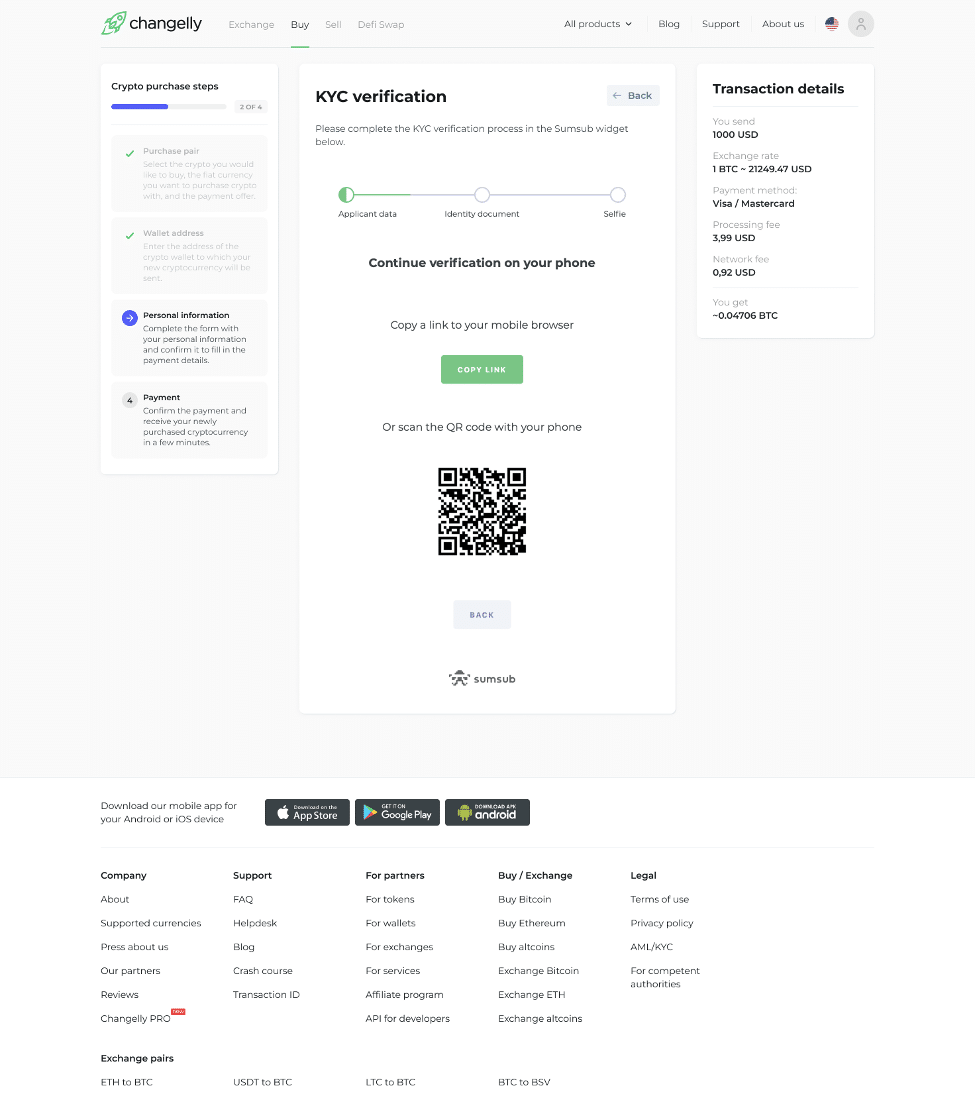
Next, it’s photo time! Please take high-quality pictures of your chosen document, capturing both the front and back sides. Make sure the images are clear and brightly lit and that the document is fully within the frame. We want to make this as convenient as possible, so feel free to switch to your phone if it’s easier for you.
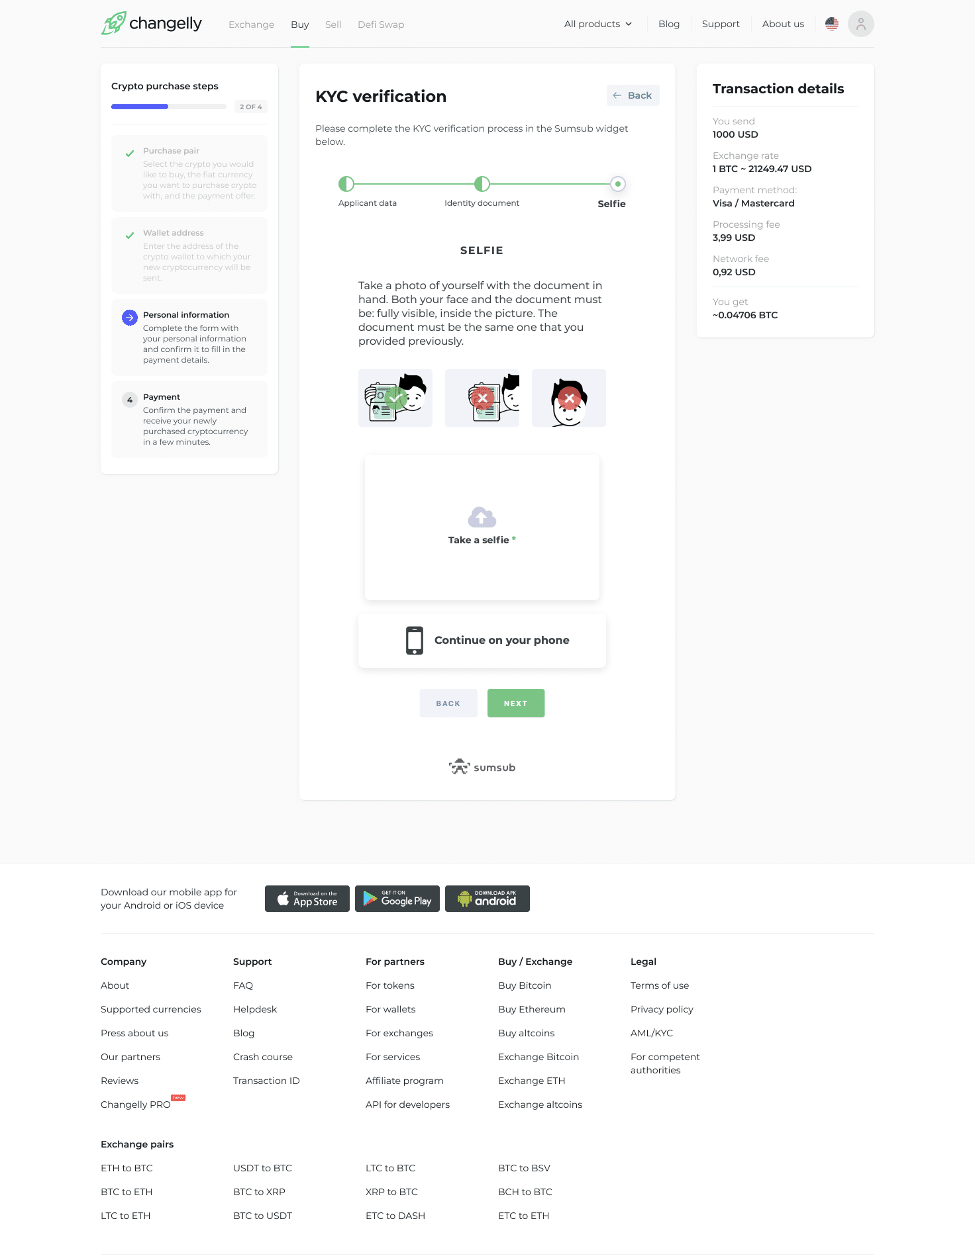
Once the photos are ready, upload them into the designated fields, then click Next. Now it’s time for a selfie — you’ll need to take a picture of yourself holding the same document. Make sure both your face and the document are clearly visible in the frame. Click Upload, then Next once you’ve successfully uploaded the image.
A summary window like the one below will then appear, displaying all the data you’ve entered for the KYC procedure. Please review it carefully for accuracy before proceeding.
Upon clicking Next, the verification process will begin, and you’ll see a Processing status being assigned to your application.
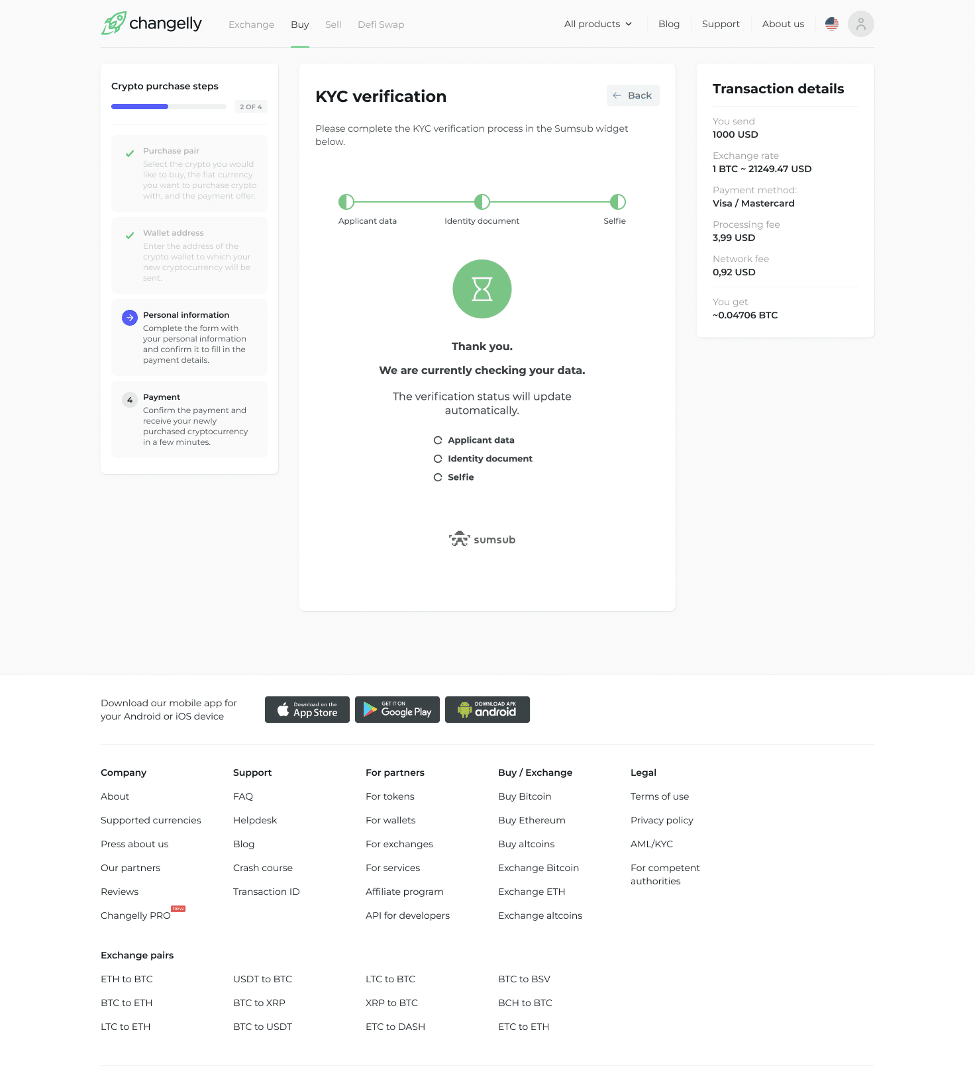
Our service partner, Sumsub, is responsible for verifying selfies and documents. Typically, it takes from 10-15 minutes up to one hour for this process to be completed. If you encounter any issues or experience delays with this specific verification process, please direct your concerns to [email protected].
If it’s taking longer than expected, don’t hesitate to contact us via [email protected].
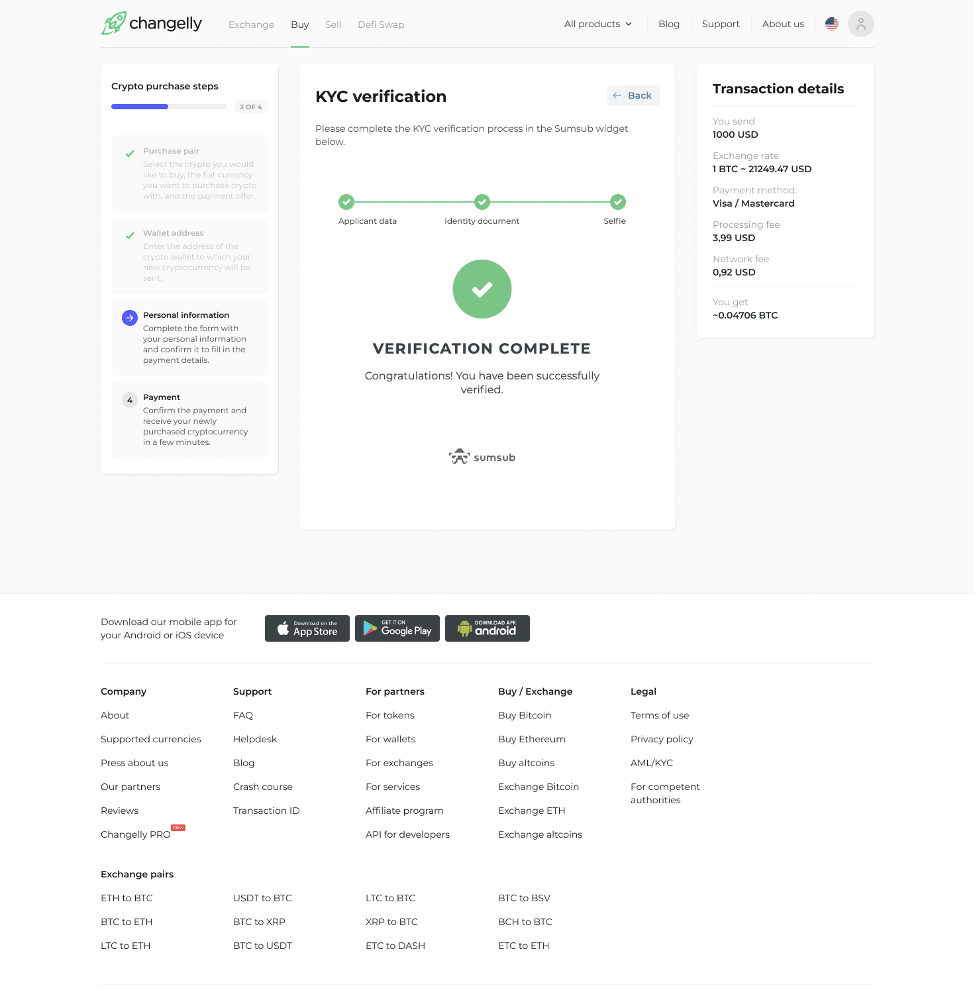
After your ID and selfie are verified, you’re all set to proceed with your purchase!
The final verification step involves confirming your mobile phone number.
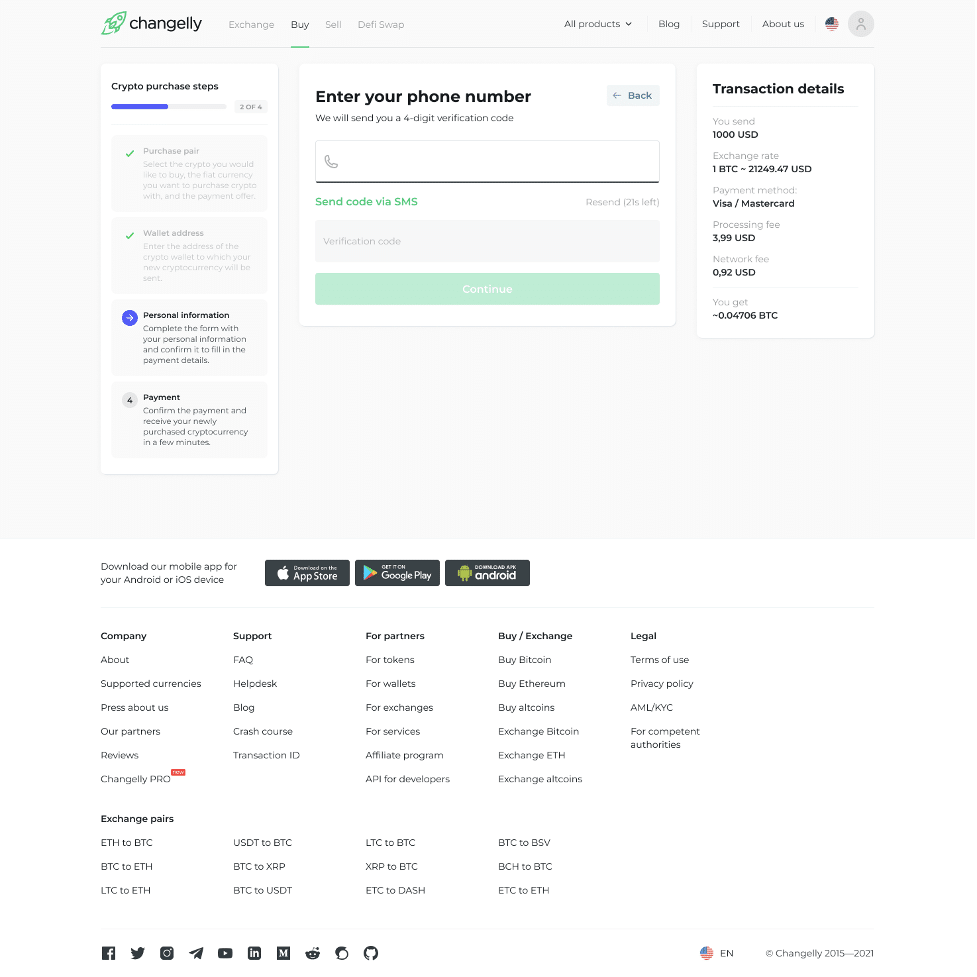
Enter it into the designated field, receive the verification code, and input it when prompted. That’s it! Just hit Continue, and you’re ready to move on to the next step of this guide. Congratulations on successfully completing the identity verification process!
Step 8. Checkout
Next, you’ll find yourself at the checkout window. Here’s your chance to verify your transaction details before you pay. Take a close look at all the details of your transaction. Don’t forget that your transaction fees are conveniently calculated and displayed on the right side of the page. Ensuring everything is correct now can save you from possible hiccups down the line!

Once you’ve looked over your data, click the “Confirm & make payment” button.
Step 9. Pay for your purchase
Time to complete your purchase! Just a quick reminder: When using our Direct Buy feature, you can currently make payments only via bank debit/credit cards.
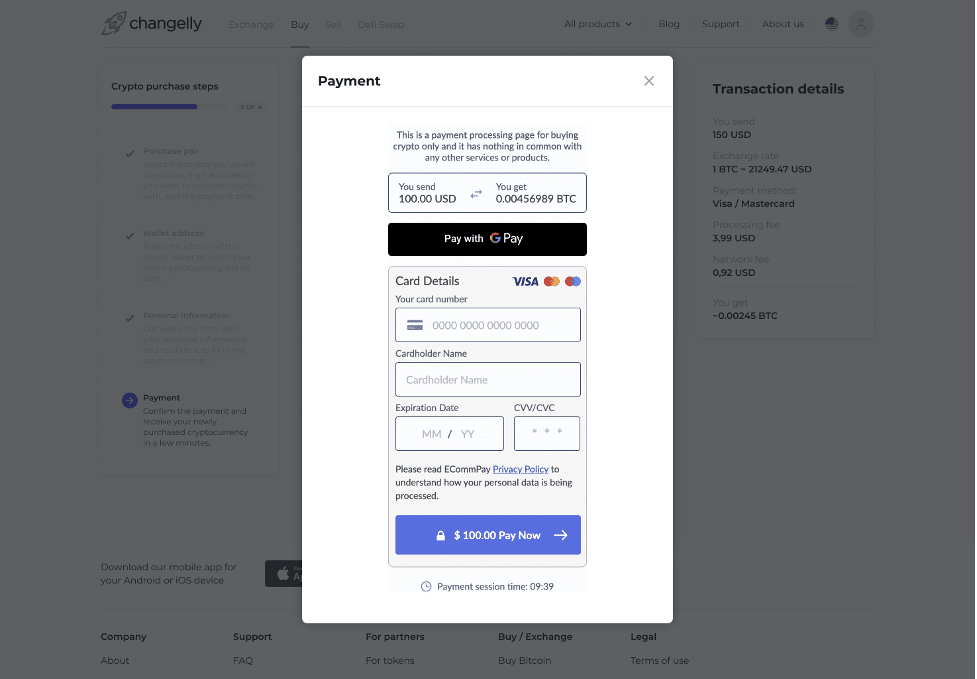
Enter your card information carefully and then double-check it. Once you’re sure everything is correct, click Pay Now.
If your order is delayed past the expected time after you’ve entered your card details, check your email. There might be a message from Switchere about card verification. If you find one, reply to it or reach out to the Switchere support team. You can use the online chat on their website, https://switchere.com/, or email them at [email protected].

As soon as the payment is processed, your newly purchased crypto funds will be whisked to your wallet. While most crypto transactions are completed within minutes, higher-than-usual activity on the blockchain can sometimes cause a slight delay. Don’t worry if it takes a bit longer — please contact the Switchere team via online chat on their website (https://switchere.com/) or via email ([email protected]).
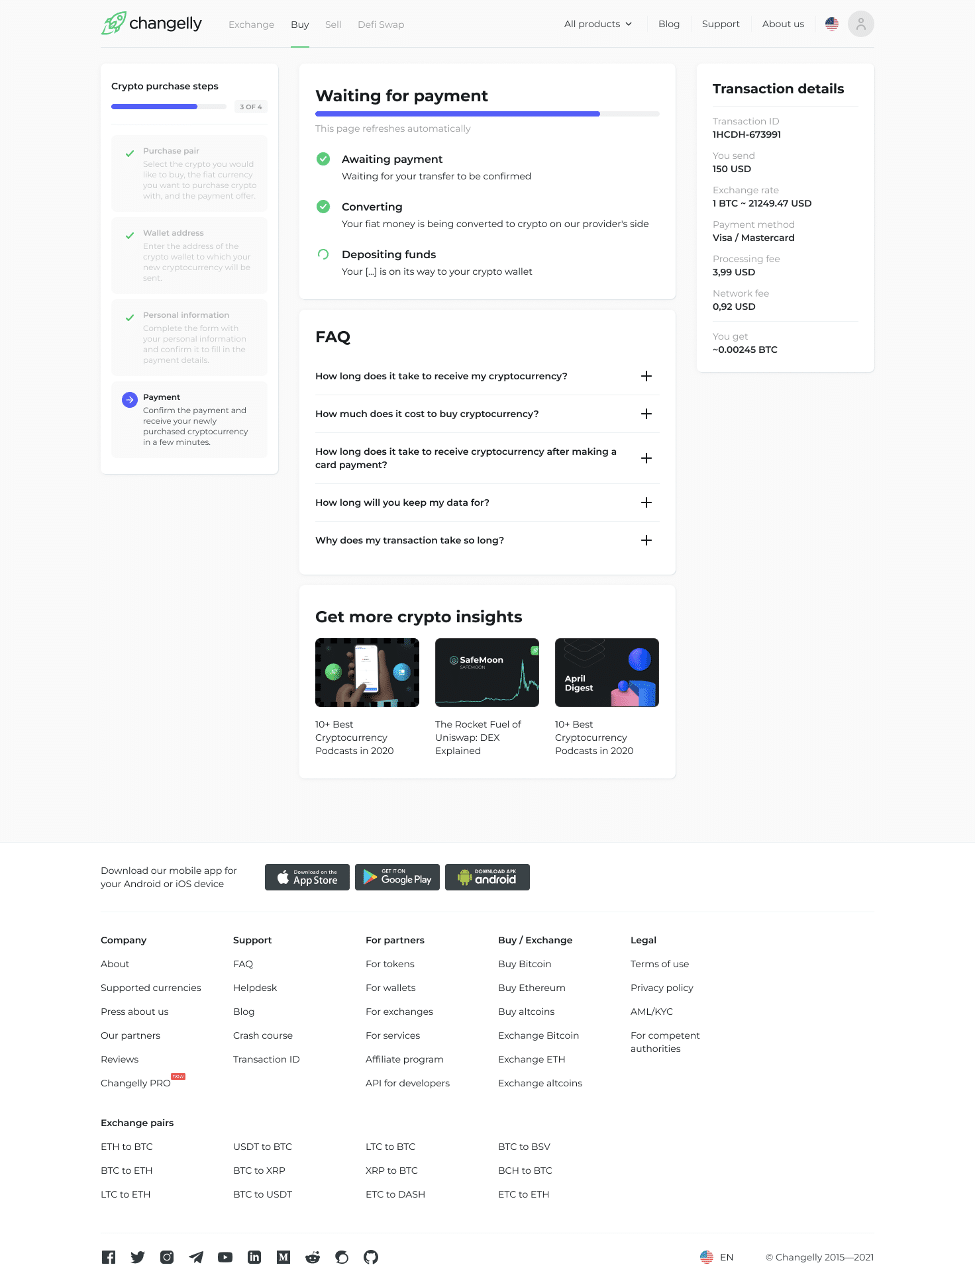
Upon the successful completion of your transaction, you’ll see a window much like the one shown below. And just like that, you’re a successful Changelly Direct Buy user!

Troubleshooting
In general, transactions take about 30 minutes to be processed. If less time has passed, please be patient. Your transaction will likely go through soon.
However, if you encounter any issues, remember that our dedicated support team is here to assist you. If you’re having trouble during the purchase process, please contact the Changelly support team at [email protected].
If the issue is related to verifying your identity, you should reach out to [email protected].
Lastly, if there’s a problem with card verification, a delay, or an issue with a transaction that’s already been paid, you should contact the Switchere support team. You can get in touch with them via online chat on their website (https://switchere.com/) or via email ([email protected]).
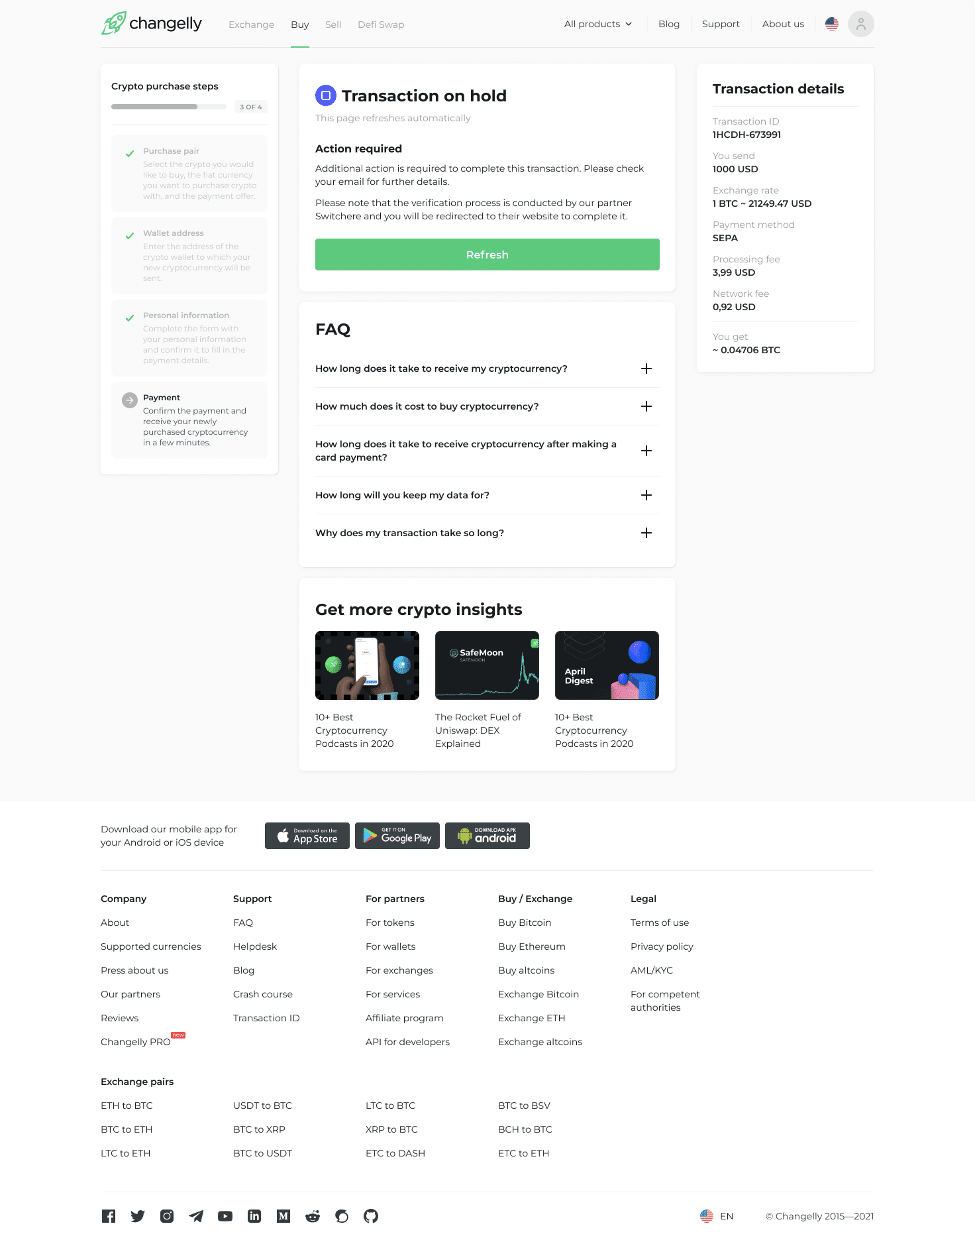
Transaction on Hold
If you see that your transaction status has switched to On Hold, don’t panic! This simply means that we need some additional information from you. Check your email inbox, where you’ll find a message from us with all the necessary details and instructions.
New Crypto Hasn’t Appeared in Your Wallet
On rare occasions, you might find that while the transaction is complete, the funds don’t show up in your wallet. Don’t worry, we’ve already finished processing your transaction at our end. If you still can’t see your funds, consider refreshing your wallet, updating it, or getting in touch with your wallet’s support team.
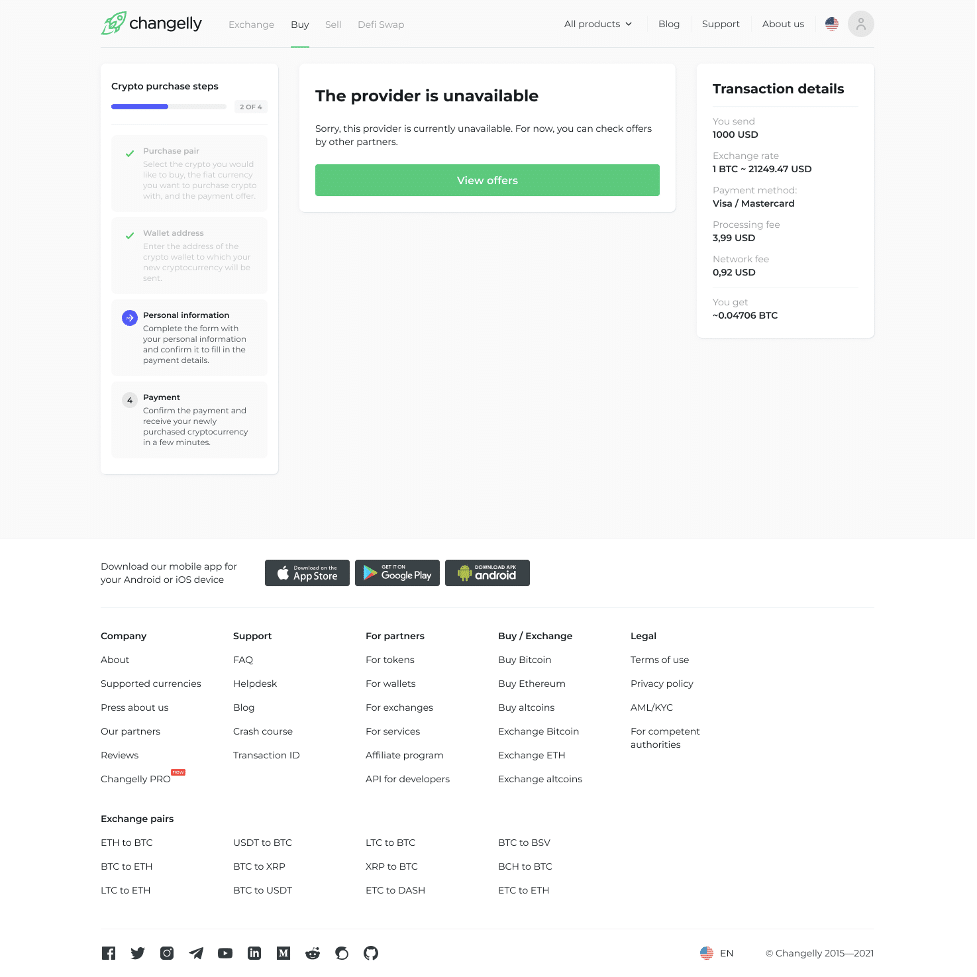
Direct Buy Is Unavailable
Noticed that Switchere’s offer wasn’t available when you clicked it? This could just be a temporary condition. While we get it sorted, feel free to take advantage of offers from our other providers.
Country Is Not Supported
As of now, our Direct Buy feature is available in a select list of countries. If you’re unsure whether it’s supported in your country, we’re more than happy to clarify it for you. Just drop us a line at [email protected], and we’ll get back to you promptly.
Disclaimer: Please note that the contents of this article are not financial or investing advice. The information provided in this article is the author’s opinion only and should not be considered as offering trading or investing recommendations. We do not make any warranties about the completeness, reliability and accuracy of this information. The cryptocurrency market suffers from high volatility and occasional arbitrary movements. Any investor, trader, or regular crypto users should research multiple viewpoints and be familiar with all local regulations before committing to an investment.