If your transaction on Changelly has been put on hold, that means we have to ask you to pass KYC/AML. In this article, we will take a look at every step you need to take to check it off your list and get back to buying and exchanging crypto. If you have any further questions, please do not hesitate to contact our security team via [email protected].
When going through the KYC/AML procedure, please double-check that any links you click on, including the official Changelly website one, are legitimate and don’t have any weird symbols/digits. Beware of scammers trying to impersonate Changelly or Sumsub.
Table of Contents
Your Transaction Has Been Put on Hold. What Does this Mean?
Our exchange uses an automated risk prevention system that safeguards both our users and the industry at large from fraudulent financial activity. If you see that your transaction has been put on hold, then it was flagged by our system. That doesn’t mean there is something wrong — just that we will have to double-check your personal and payment information. This is a regular procedure that is present on most crypto exchanges.
If your transaction was put on hold by our system, then you have to pass the KYC/AML procedure. It’s super quick and easy to do. You can learn more about this procedure and its importance in this article. To put it simply, it is designed to make the crypto space more secure and identify criminals that use crypto to launder money.
Passing KYC/AML on Changelly’s Website
The easiest way to pass KYC is to do it on our website. To begin the process, which is powered by Sumsub, log into your Changelly account, go to your transaction history, and then click on the transaction that has been put on hold.
Step 1: Enter Your Name and Email Address
Here’s the screen you will see when you start the KYC/AML procedure. For the first step, you will have to provide us with some basic personal information: your first and last name and your email address. Once you enter them in the relevant fields, click “Next.”

On the right side of the screen, you can see the overview of the transaction on hold.
Step 2: Submit Your Identity Verification
After you click the “Next” button, you will get to the page where you will receive a request to submit some information about your identity verification document. First, select the country where the document was issued from the drop-down list. Afterward, choose the type of document you are going to use. To see the full list of ID documents accepted depending on the country, go here.

You will have to submit a picture of your identity verification document — both from the front and the back. Here are some guidelines for how to take the picture:
- The pictures have to be crisp. Any written text should be clearly visible and readable.
- The pictures should not be edited or altered in any way.
- The document should be seen in full; it should be positioned in the center of the picture.
- Don’t position your camera too far away from the document: it should take up most of the screen.
Once you take those pictures according to the guidelines, click “Upload.” When uploading is completed, click “Next.”
If you don’t have a way to transfer those photos to your PC, you can choose to upload them directly from your mobile phone. To do that, click “Continue on your phone.” You will be redirected to a page where you will be presented with two options: to either copy a link or scan a QR code with your phone’s camera.
Step 3: Take a Selfie
Next up, you will have to take a selfie. It should have a clear view of both your face and the ID document you submitted in the previous step. Here are some guidelines on how to take the photo:
- Both your face and the ID document should be clearly visible in the picture. .
- There should be sufficient lighting.
- You cannot wear masks, have hair covering your face, or have your features otherwise obstructed.

Just like in the previous step, you will also have the option to take a photo on your mobile device. You can do that by clicking the “or continue on a phone” line.
Once that’s done, click “Next” to move to the next step.
Step 4: Liveness Check
For the final step, you will have to pass a liveness check. It is a biometric check that proves that you are a real person and not a robot. It is typically a lot more reliable and faster than the selfie verification process. Although it is named “selfie” on both our and Sumsub’s websites, in reality, it requires you to take a short video.
You will have to do the liveness check using your webcam. Once you click on the “I’m ready” button, your browser will most likely ask permission to use your webcam — typically, a little pop-up will appear in either the upper left corner of your screen or in the middle. Allow the website to get access to the camera and prepare to take a picture. For detailed instructions on how to give your browser permission to use your webcam, see this section of Sumsub’s FAQ. Alternatively, you can also complete it on your phone by clicking the “or continue on a phone” phrase.
Here’s the screen you will see when you’re about to pass the liveness check on Changelly.
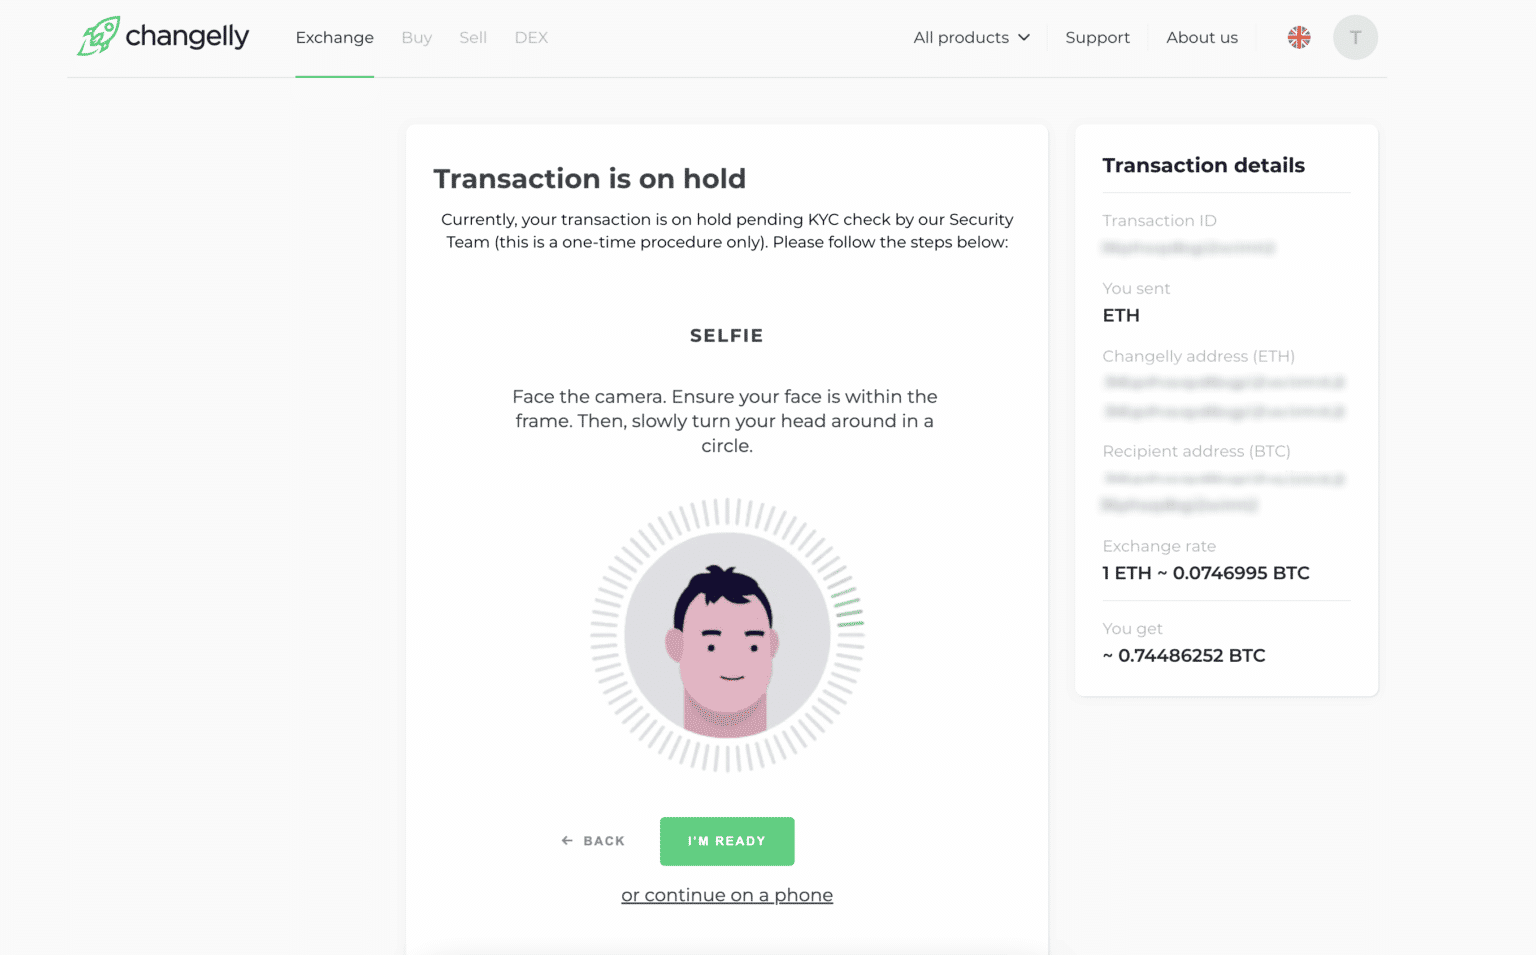
Follow the instructions you will see on the screen. You will need to position your head so that it’s right in the middle of the circle. Please note that it has to be fully visible; don’t move too close to the camera.
Once you’re done, click “Next.” It will take the program 1 to 3 minutes to check your selfies. If there is something wrong with them, you will have to redo this step. Otherwise, you will see a “Verification complete” screen — from then on, all you have to do is wait for an email from our security team ([email protected]). It will be sent to the email address you used to create your account on Changelly. If you are passing KYC for a transaction from our API partner, the security team will contact you at the email address you provided at the beginning of the procedure.
Passing AML/KYC via Changelly’s Mobile App
What should you do if you notice in the mobile app that your transaction has been put on hold? Transaction suspension is related to the need to go through the KYC procedure. Let’s break down how to do this in the mobile app with the help of our partner Sumsub.
Step 1: Open the Transaction Details
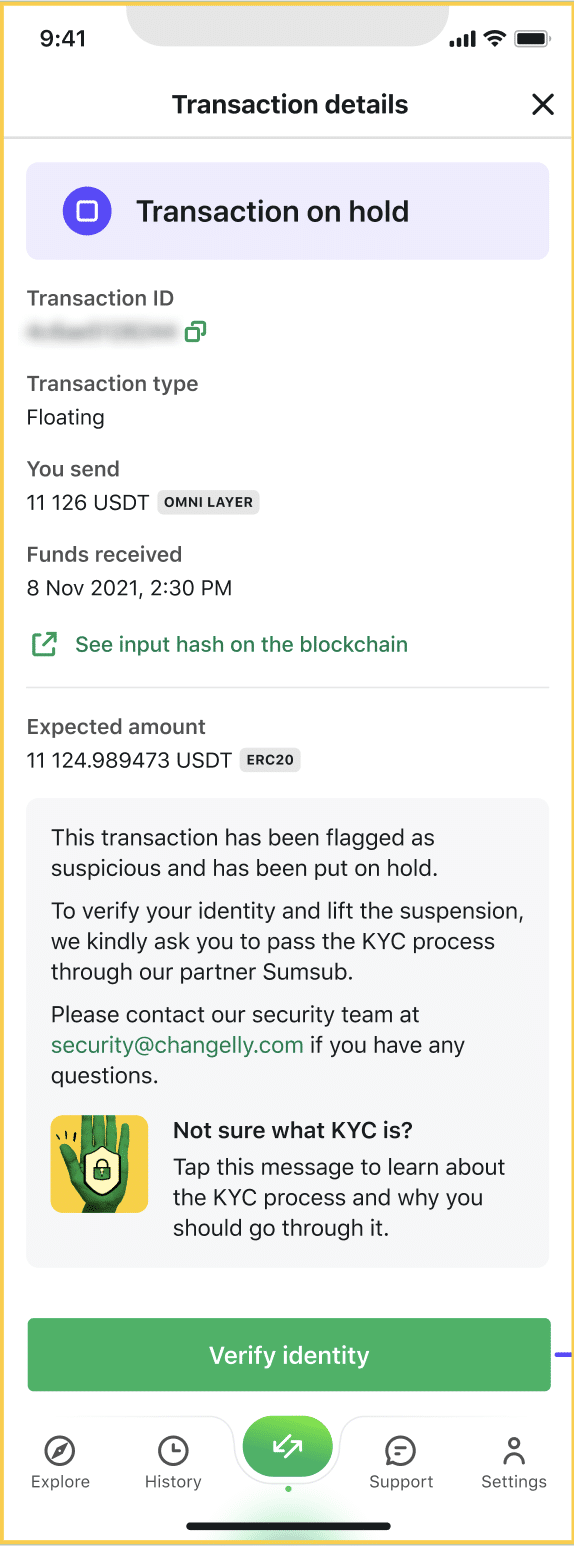
A notification about a paused transaction can appear while you still have transaction details open. In this case, you will notice your screen change to the new one, at the bottom of which you will see the “Verify identity” button — it is the button you should tap.
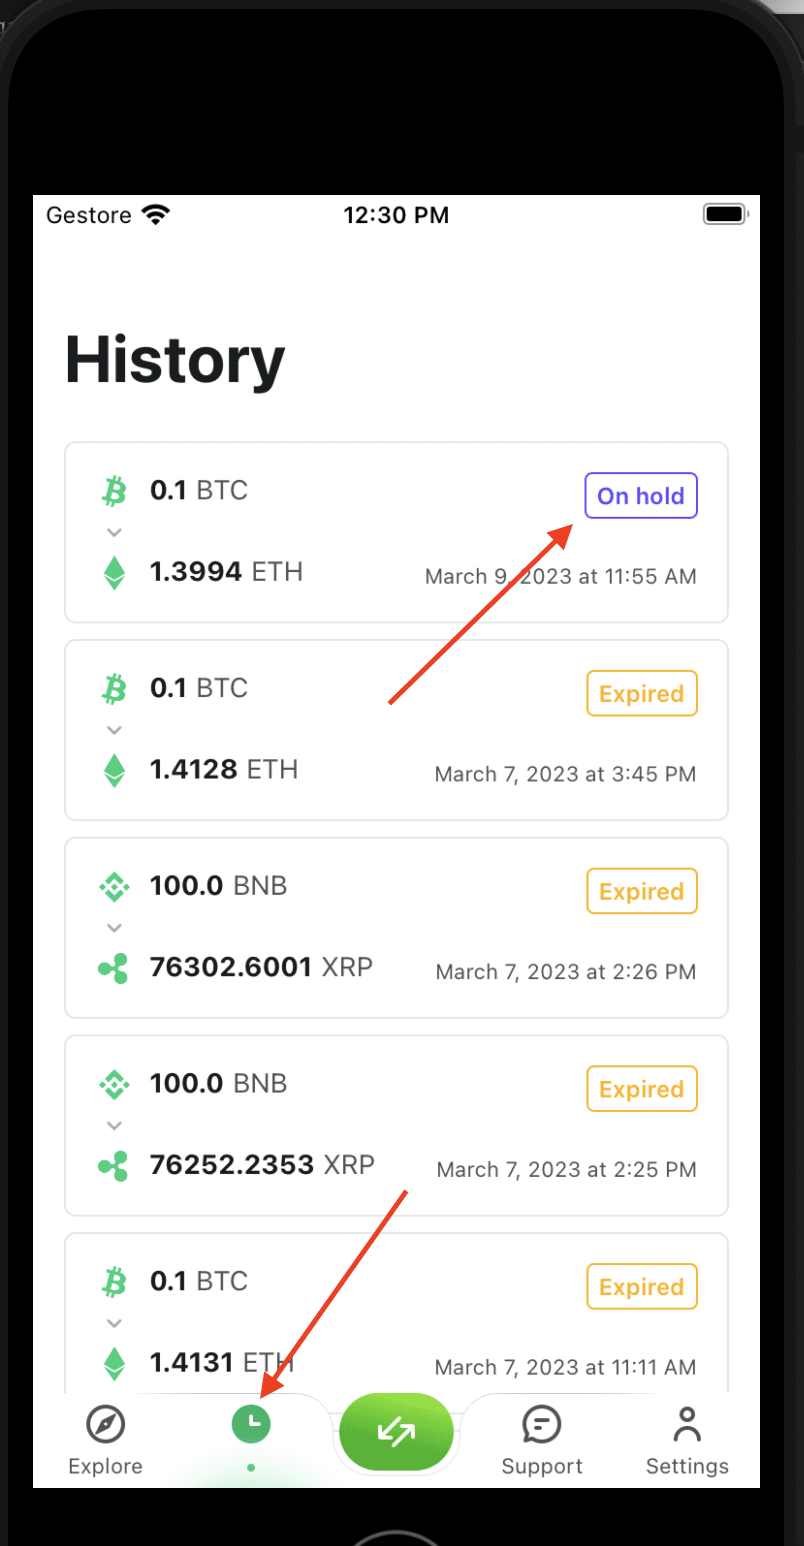
If you have already closed transaction details, you should go to the History section and select the suspended transaction from your transaction list. When you open it, you’ll see the “Verify identity” button at the bottom — you need to tap it. After that, you’ll be redirected to the verification page.
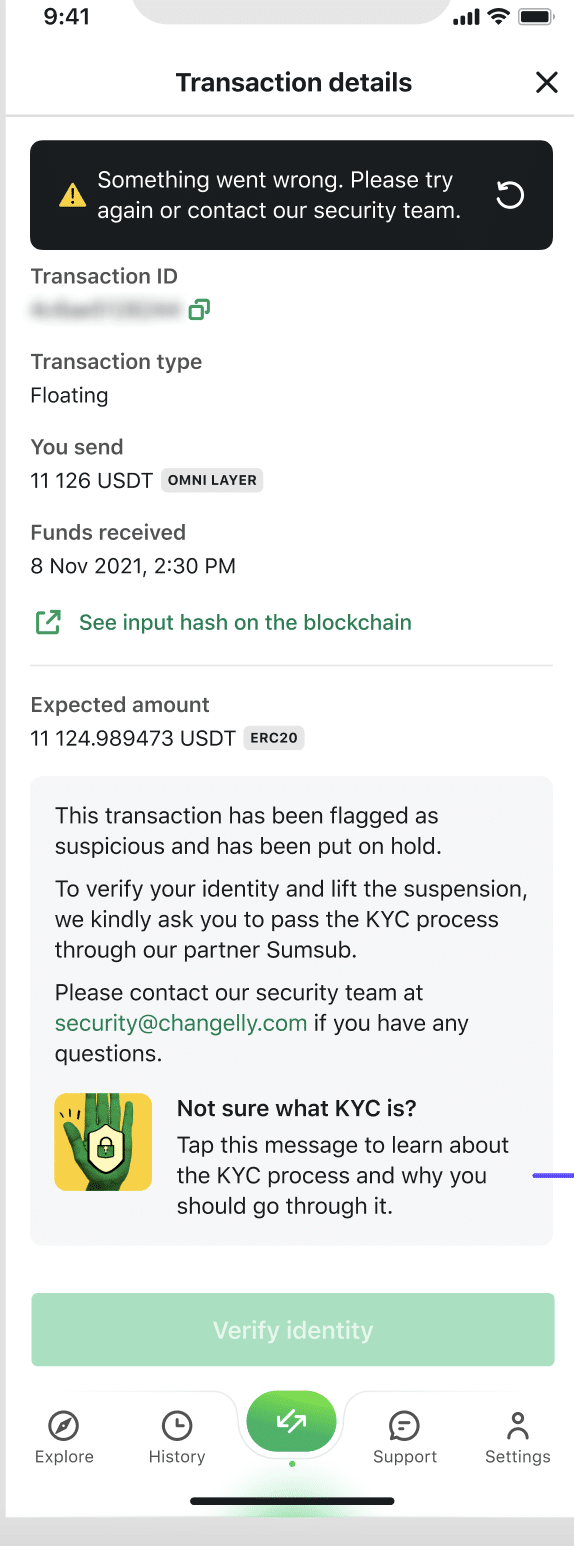
Another very rare but possible way of encountering the KYC/AML procedure is through a failed transaction. In this case, you will see a notification in the form of a black snackbar at the top of the screen. If you experience this particular scenario, please send us an email at [email protected].
Step 2: Fill in Your Personal Information

Above is a screenshot of the fields you will need to fill out after tapping the “Verify identity” button.
First, choose “Profile details.” Enter your first name, last name, and your email address. To ensure that we can contact you easily, please provide the email address you frequently check.
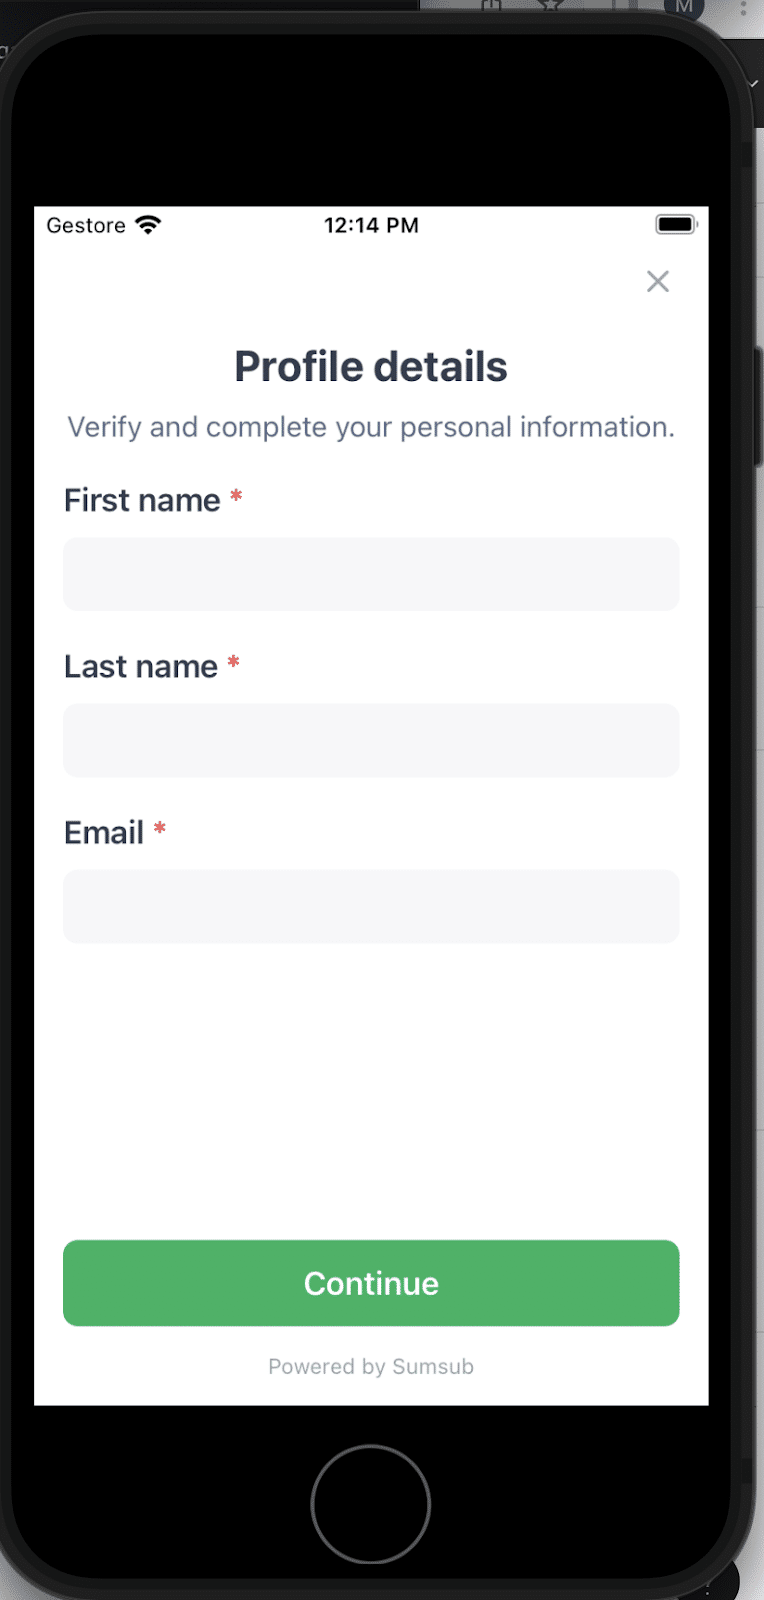
After successfully completing the first section, you will see that it has changed color to yellow and that the Submitted status has been assigned. This means that we can move on to the next step.

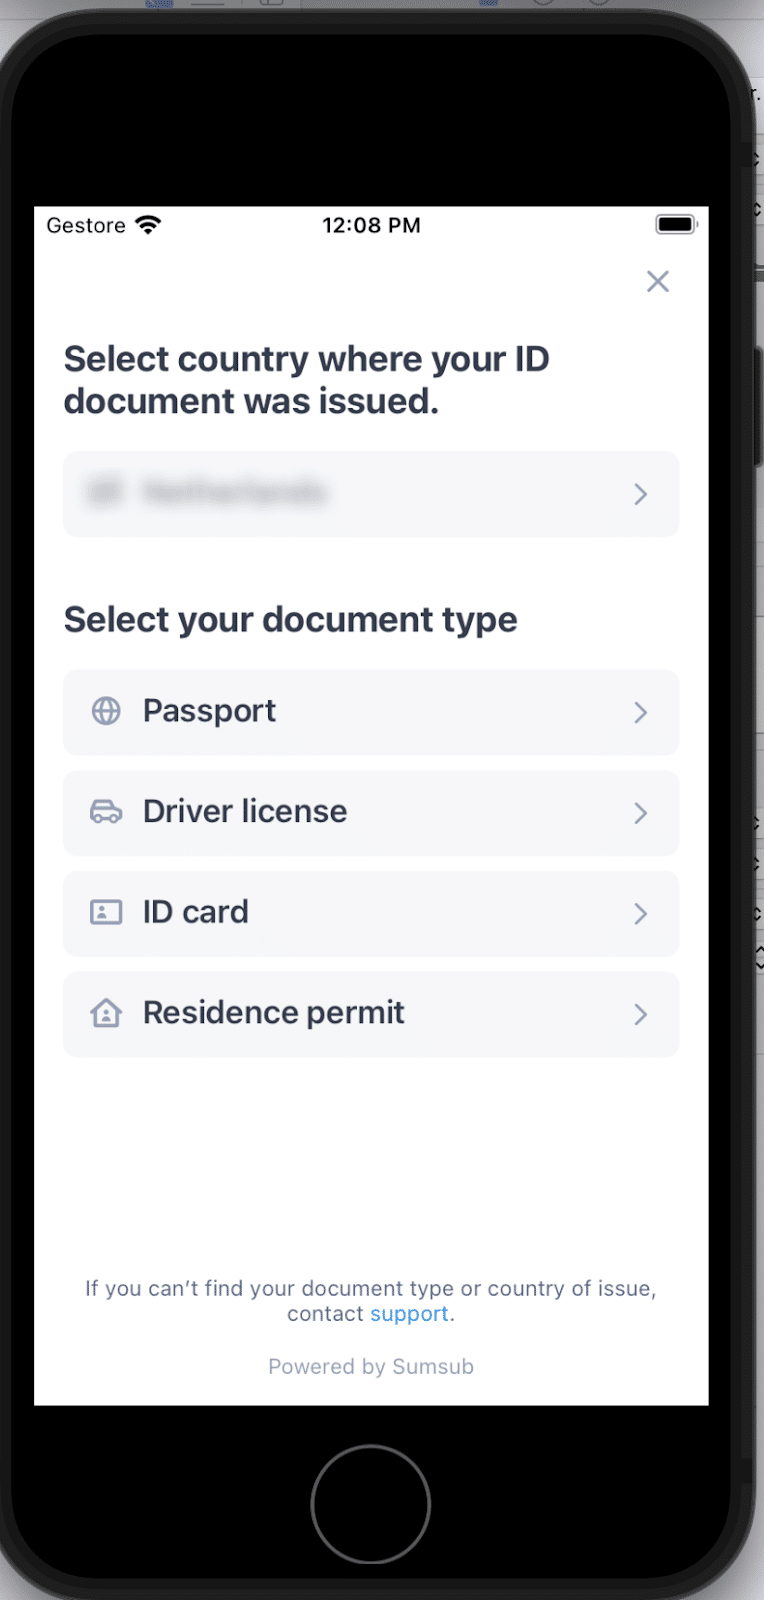
Step 3: Upload Your Identity Document
This document can be a passport or an ID card, a driver’s license, or a residence permit. Please note that before you choose the type of document and upload its pictures, you must select your country of residence.
To have your identity verification document accepted, you must submit clear, unaltered pictures of its front and back sides. Position the camera on the document so that your ID takes up most of the screen, and make sure any written text is visible and readable. Then, tap “Upload,” and once uploading is completed, choose “Next.”
When both pictures are uploaded successfully, you can move on to the next step.
Step 4: Take a Selfie
To complete this step, you must take a selfie of yourself holding the proof of identity that you previously submitted. The photo should have sufficient lighting and clearly show your face and the ID document. Please make sure there is no obstruction of features, including masks or hair covering your face.
Step 5: Liveness Check
A liveness check is the final step toward verifying your identity. This biometric process helps ensure the most reliable yet fast verification.
You need to take a short video following onscreen instructions. Be sure to position your face in the middle of the circle. Don’t bring the camera too close: your face must be fully visible.
Afterward, tap “Next” and wait 1–3 minutes for verification results. If your selfies are marked as incorrect, please repeat this step.
If you have passed all the verification steps correctly, you will see a screen like the one below.
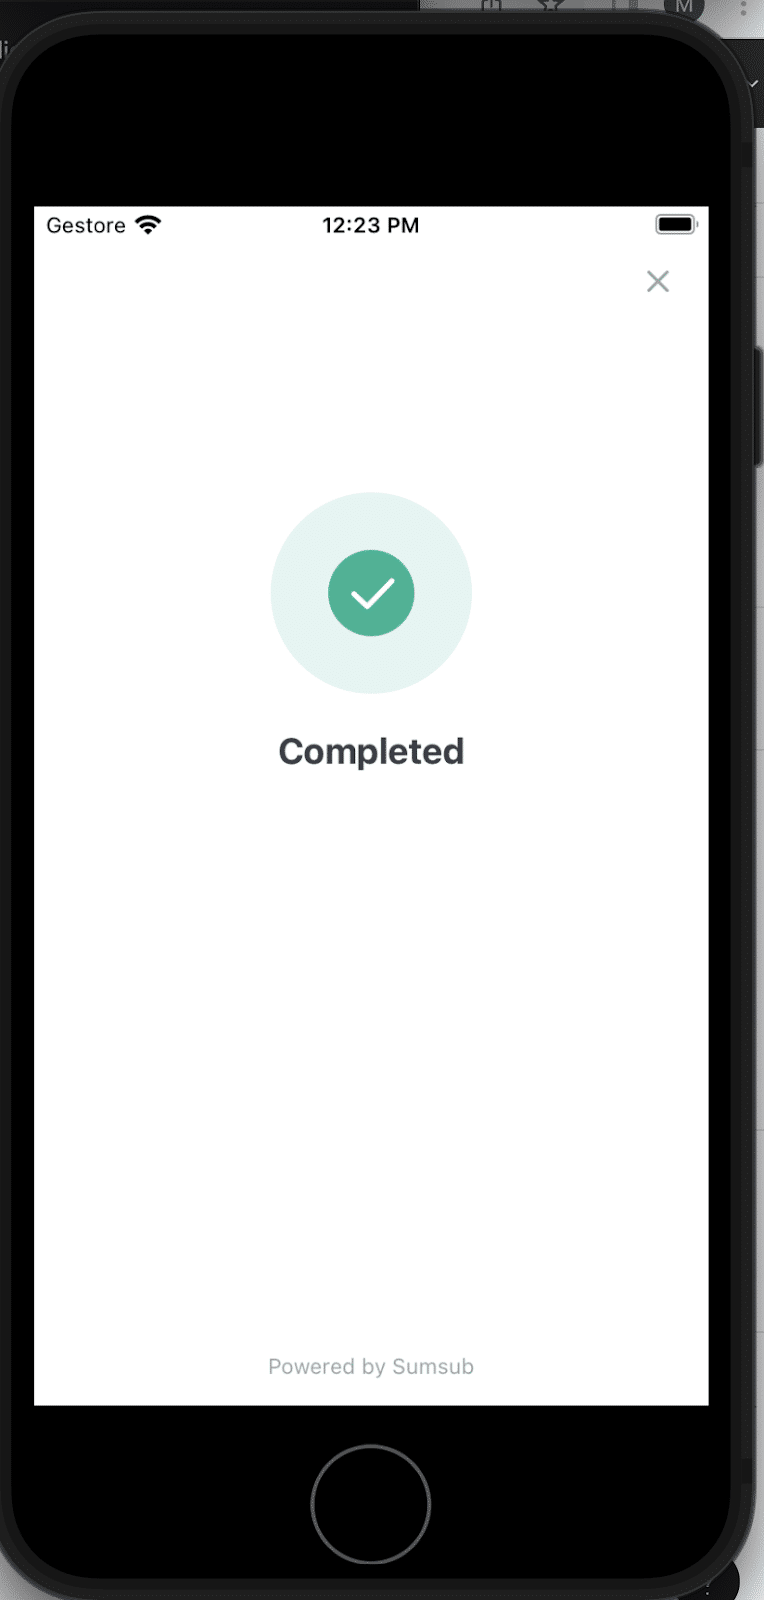
That’s it! If verification is completed, our security team will inform you via the email you provided.
If you face an error or get a notification of unsuccessful KYC, please contact our security team at [email protected].
What’s Next?
No matter what platform you completed KYC on, once you upload all the necessary documents, the only thing left to do is wait. If there are any issues with the pictures you have submitted, our security team will contact you via your email address and instruct you on what you should do next.
Depending on how busy Sumsub is, KYC might take a bit longer than usual. We ask for your patience — delays like that are, unfortunately, completely out of our control.
As long as there are no issues with any of the information and photos you have submitted to us, your funds will be released. You will get an email from our security team, where they will give you further instructions if necessary.
Source of Funds
In some cases, we might ask you to prove how you got the funds you are using on our platform. You may be requested to provide us with a document that proves your source of funds. It could be one of the following:
- Any receipts or screenshots from a cryptocurrency marketplace or exchange that shows how you got the funds you were using on Changelly
- A bank statement that proves you actually purchased the crypto funds you used on our platform
- If you bought crypto on a P2P platform or got it directly from another user, please provide an agreement, screenshots, or any other proof that the transaction has indeed taken place
If you cannot procure any of those documents, please contact our security team via [email protected] for further assistance.
Please note that these documents have to be clear and show all applicable information, such as your personal details and the time any relevant transactions were made.
If the proof you submitted is sufficient, we will send you an email that you have successfully passed KYC/AML. Otherwise, we will send you further instructions and might ask to send us additional documents proving the origins of your funds.
Common Issues
There are some common issues that can arise during the KYC/AML process. Here are some of them.
If you don’t find your issue here, you can check out Sumsub’s FAQ. Alternatively, you can also contact our security team via [email protected].
My ID Document Was Rejected. Why?
Your ID document can be rejected for a few reasons. Let’s take a look at some of the most common ones.
- Your document is in an unsupported language
Sumsub supports a wide variety of languages, including ones that use a non-Latin alphabet, like Korean, Chinese, and so on. Unfortunately, some languages are still unsupported; you can see the full list here. If your ID document is in one of those languages, you will have to provide us with a notarized English translation of it.
For detailed instructions on how to do this, see this article.
- Your photos weren’t clear enough
In some cases, you may be asked to retake pictures of your ID document if the program wasn’t able to decipher what’s written on them. If possible, try to take pictures with a better camera in a well-lit place and against a white background. Make sure the document you’re taking photos of is in focus and is fully in frame.
My Sumsub Link Expired
If you see this screen, it means your Sumsub link has expired. Please note that it is only valid for 24 hours, so try to open it and go through the verification process as soon as possible.
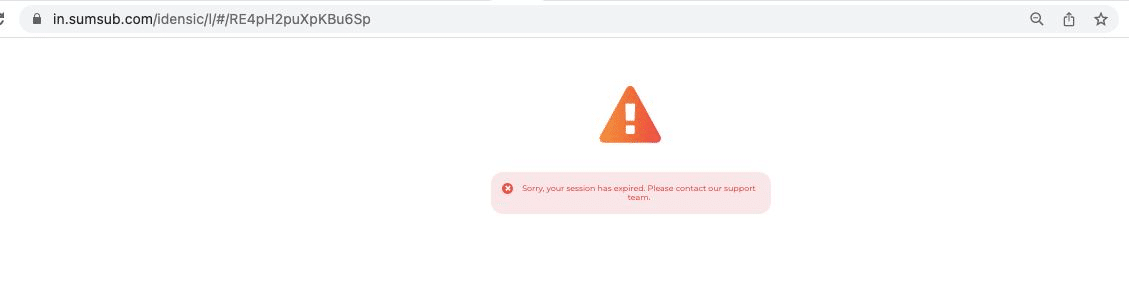
You can contact our security team to request a new link.
My Camera Doesn’t Work
You will need access to your webcam or phone camera in order to get verified. However, sometimes it does not work. If you intend to use a webcam and it’s not turning on, check whether it is currently being used by another application, like Skype or Zoom. If not, or if you are having trouble with a phone camera, see this article on how to re-enable blocked access in different browsers and OS.
If none of the advice in the article above helps, try restarting your device or seeing if the camera still works in other apps. If it doesn’t, it may be broken, or there may be an issue with your device’s software — in that case, you should take it to a repair service.
I Failed My Liveness Check
You may be asked to redo the liveness check for a few reasons. Here are some of them:
- Poor lighting
Your face has to be clearly visible on the screen. Do the check in a well-lit room and try moving closer to the light source if the program still can’t detect your facial features.
- Your face is positioned incorrectly
Your face should fit fully inside the frame. Make sure you’re neither too close nor too far from the camera. Additionally, you should not be wearing anything that can obscure your face — please take off your glasses, hats, and masks.
- Using filters
Please don’t use any camera effects or filters when passing the liveness check — they can obscure your facial features.
Disclaimer: Please note that the contents of this article are not financial or investing advice. The information provided in this article is the author’s opinion only and should not be considered as offering trading or investing recommendations. We do not make any warranties about the completeness, reliability and accuracy of this information. The cryptocurrency market suffers from high volatility and occasional arbitrary movements. Any investor, trader, or regular crypto users should research multiple viewpoints and be familiar with all local regulations before committing to an investment.